Chauvet Festoon 2 RGB- Demo / Review

We’ve tested moving heads, speakers, mixer and more but never festoon lighting so being able to test the new Chauvet Festoon 2 RGB was certainly a welcome change!
Unfortunately with all of the current situation surrounding us we haven’t been able to test them ‘on the road’ but instead we’ve tried them out at one our own team BBQ’s at home and also in our unit!
Overview
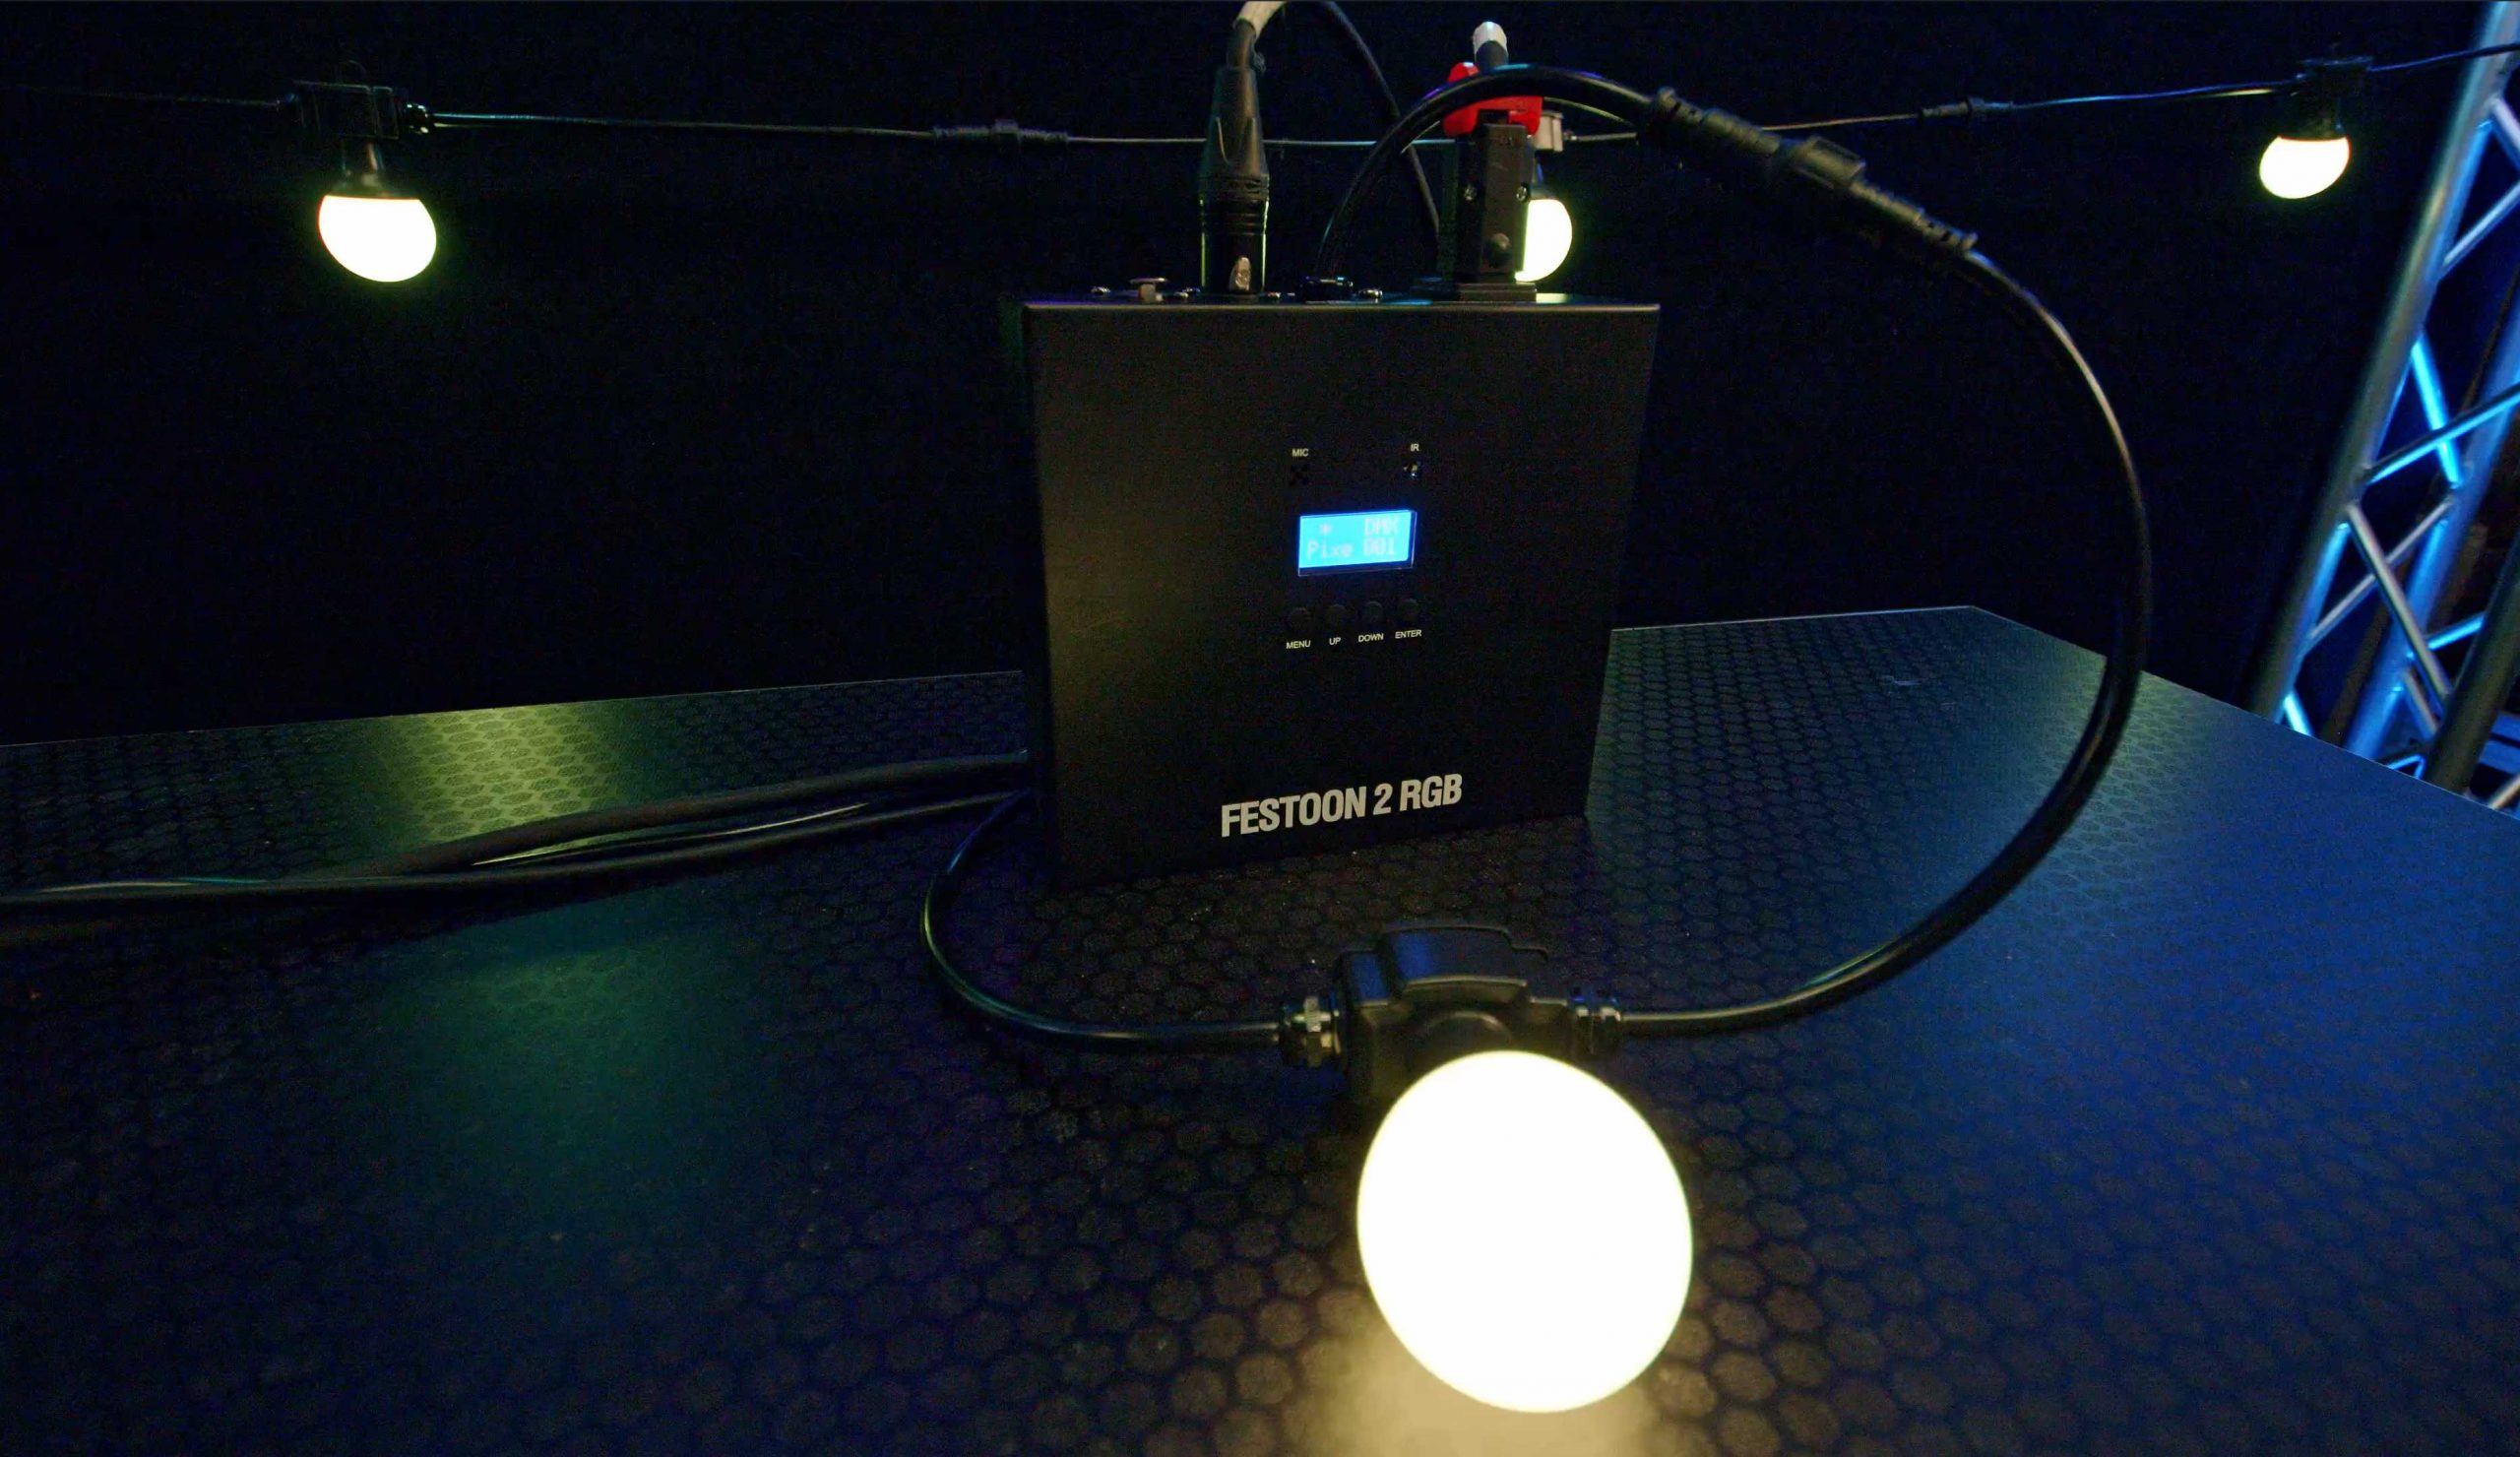
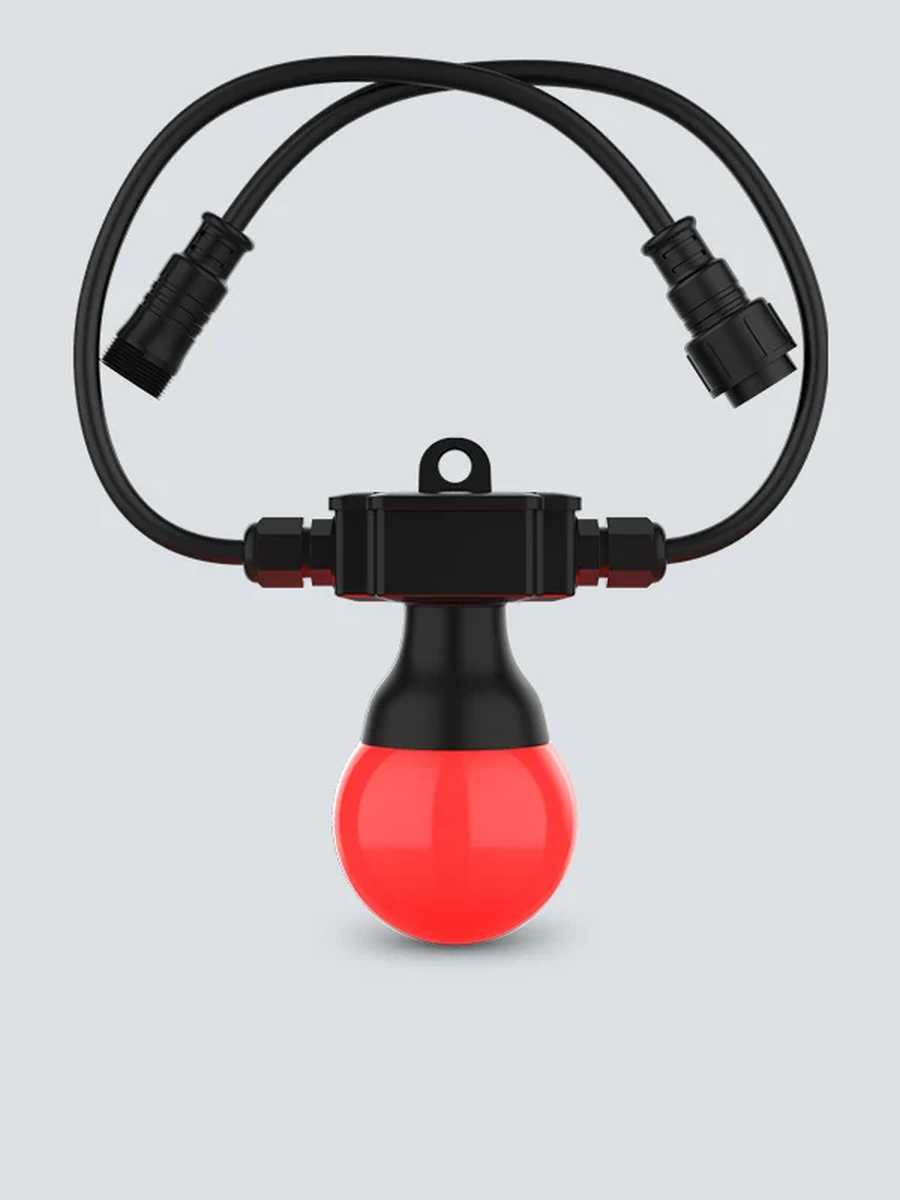
The Chauvet Festoon 2 RGB is essentially a string of LED lamps on a ‘string’. Each string of Festoon 2 RGB has 20 lamps (or bulb as Chauvet call them), these strings are 15m long and they are also IP54 rated so they are suitable for temporary outdoor use which is where their effect really comes alive!
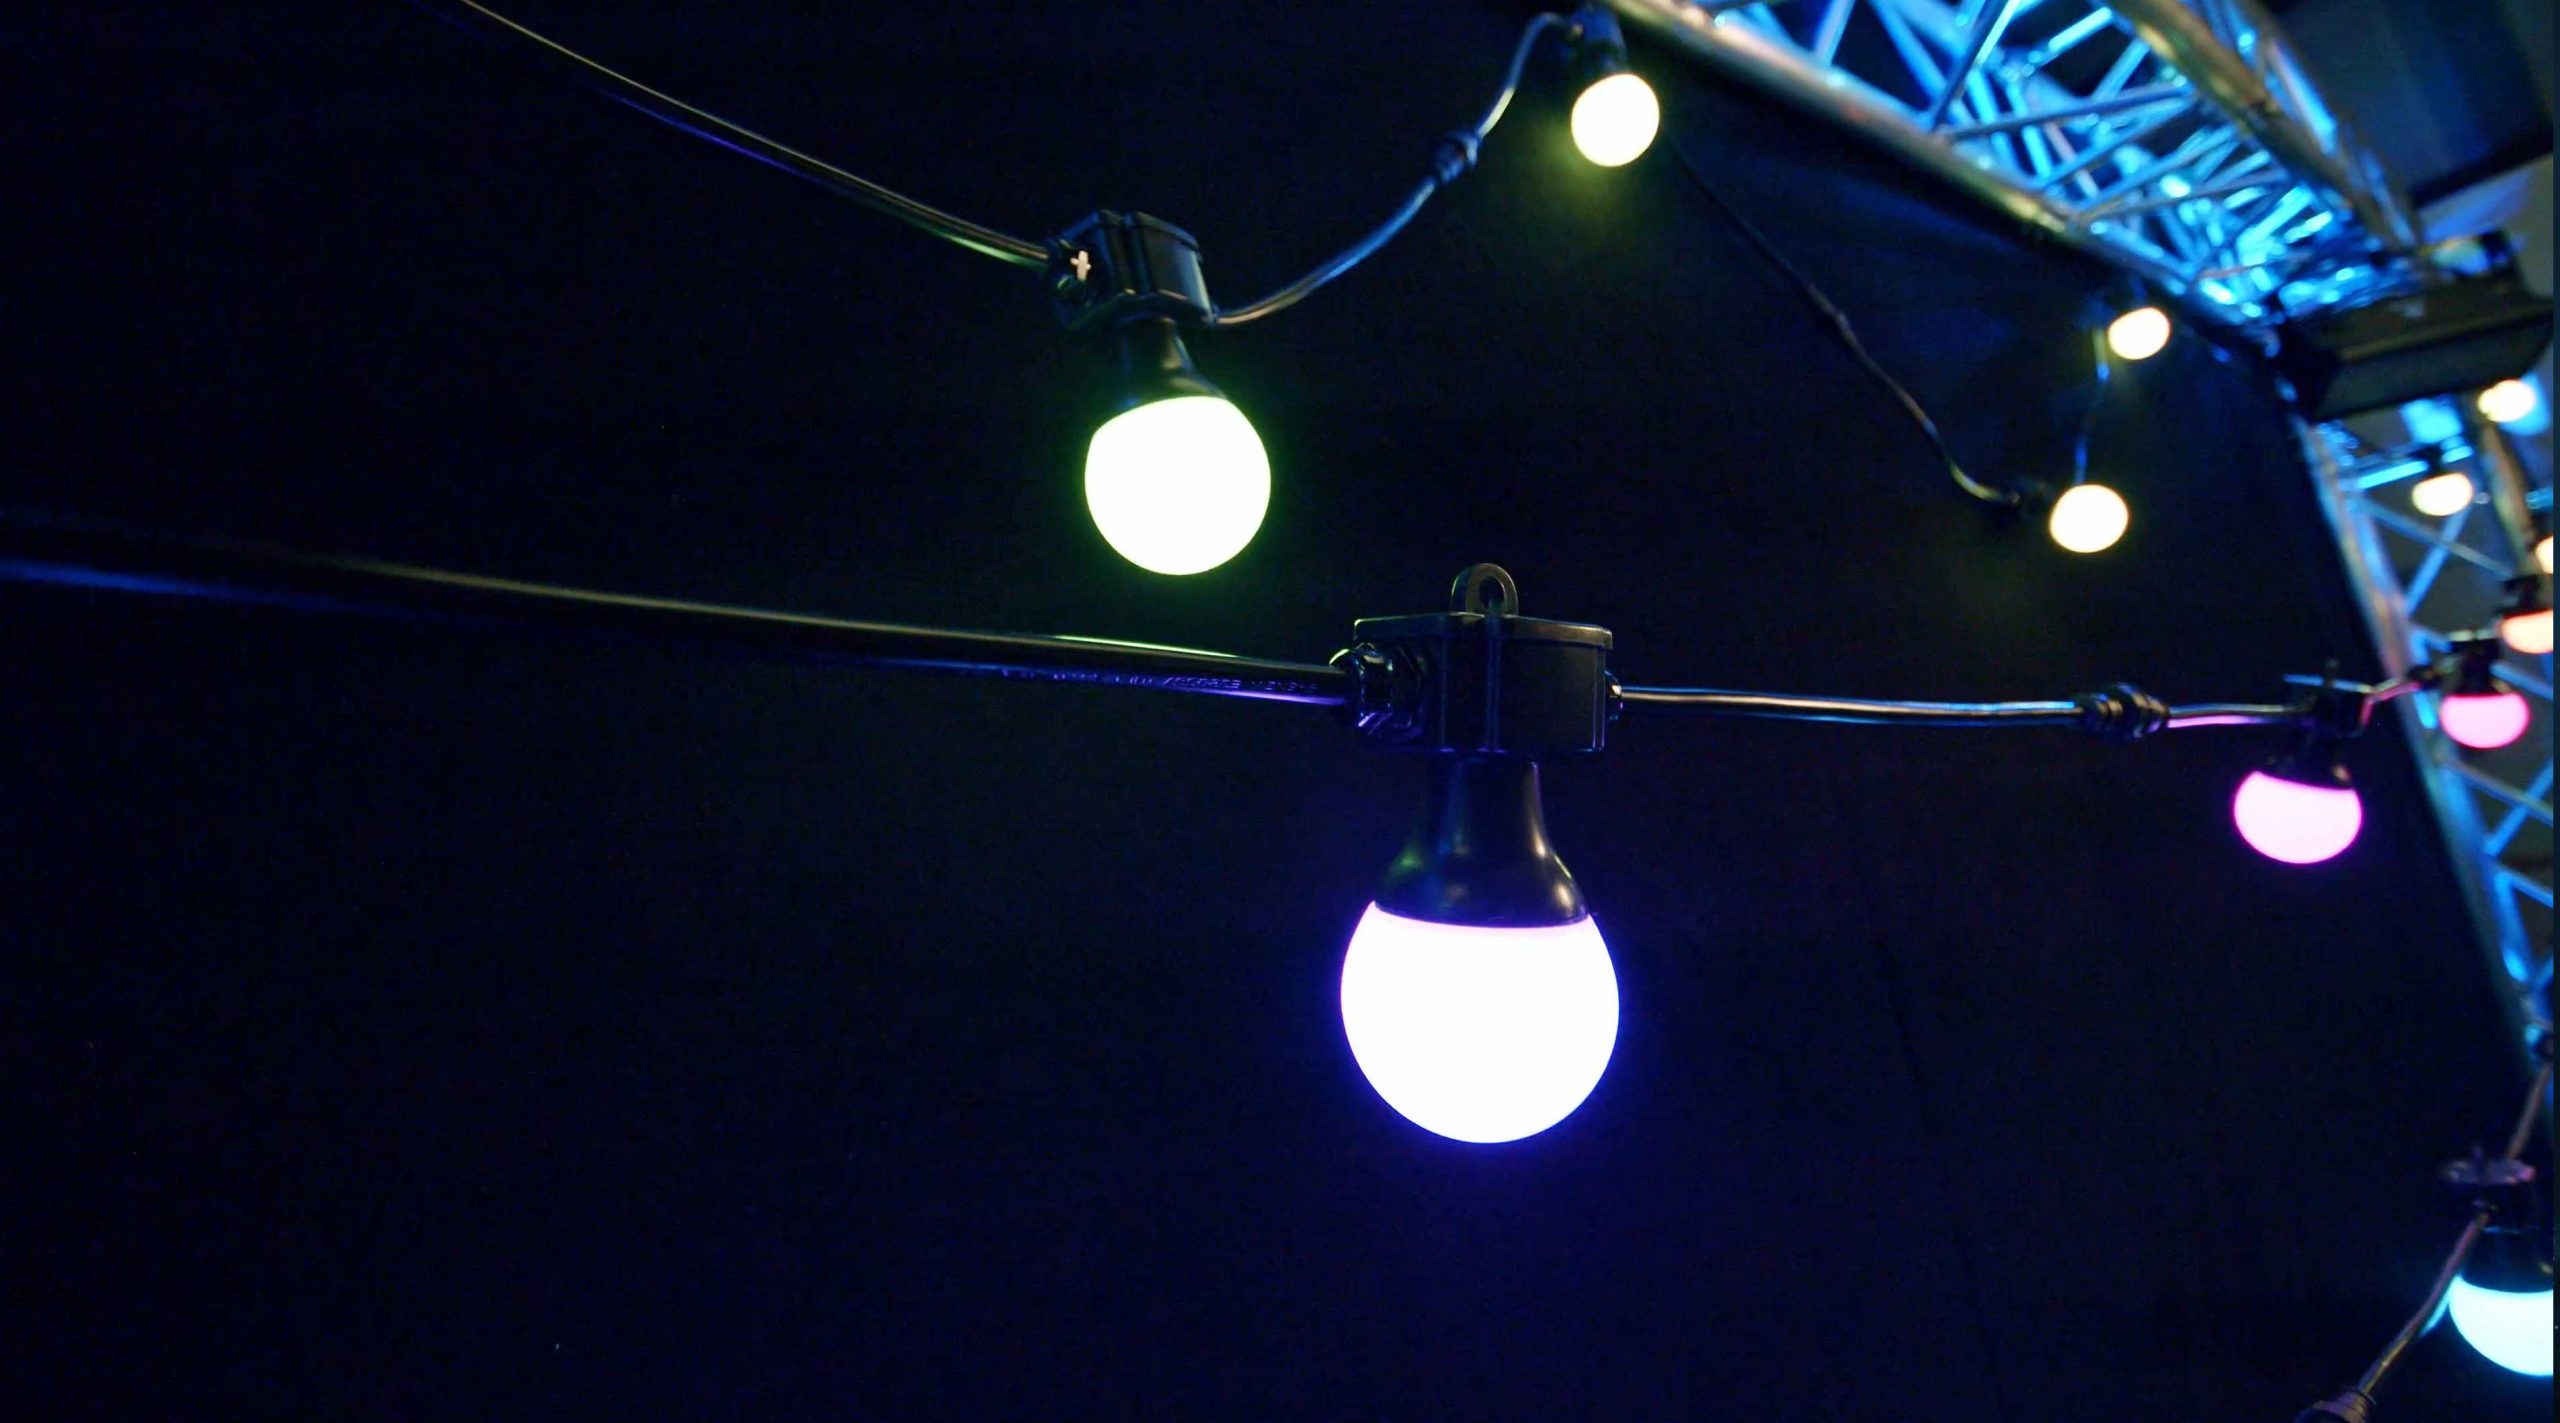
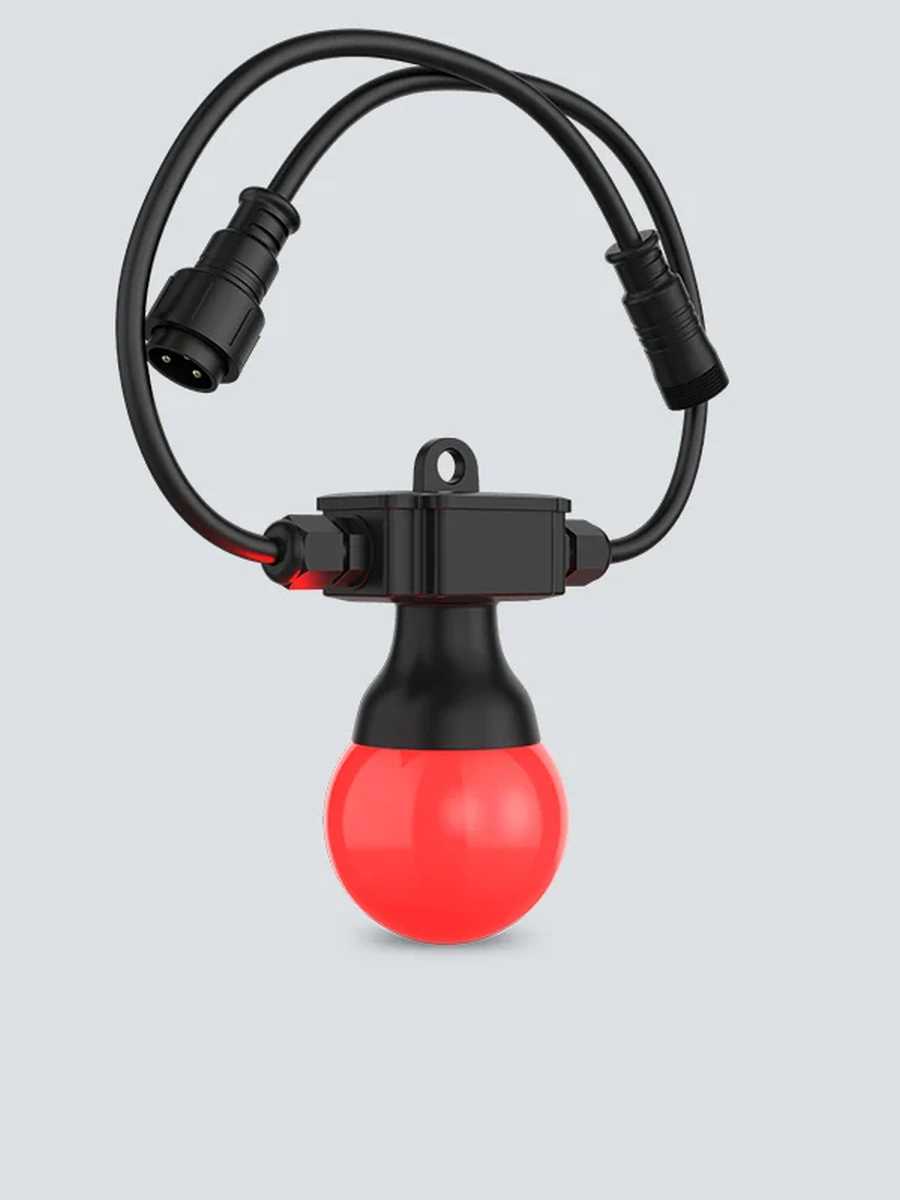
Each bulb is permanently mounted on the string so you can’t change the actual bulb itself but you can change an individual section of string that contains the bulb. Each section is around 75cm long and has a waterproof connector to attach to the next section, and of course 20 of these make up the 15m long string of festoon. You can connect up to 3 strings (60 bulbs) to one control unit.
Each bulb is pixel mappable meaning that each individual bulb can be individually controlled so if you want to do rainbows or chases up and down the string of lights you can, and let me tell you this looks amazing!
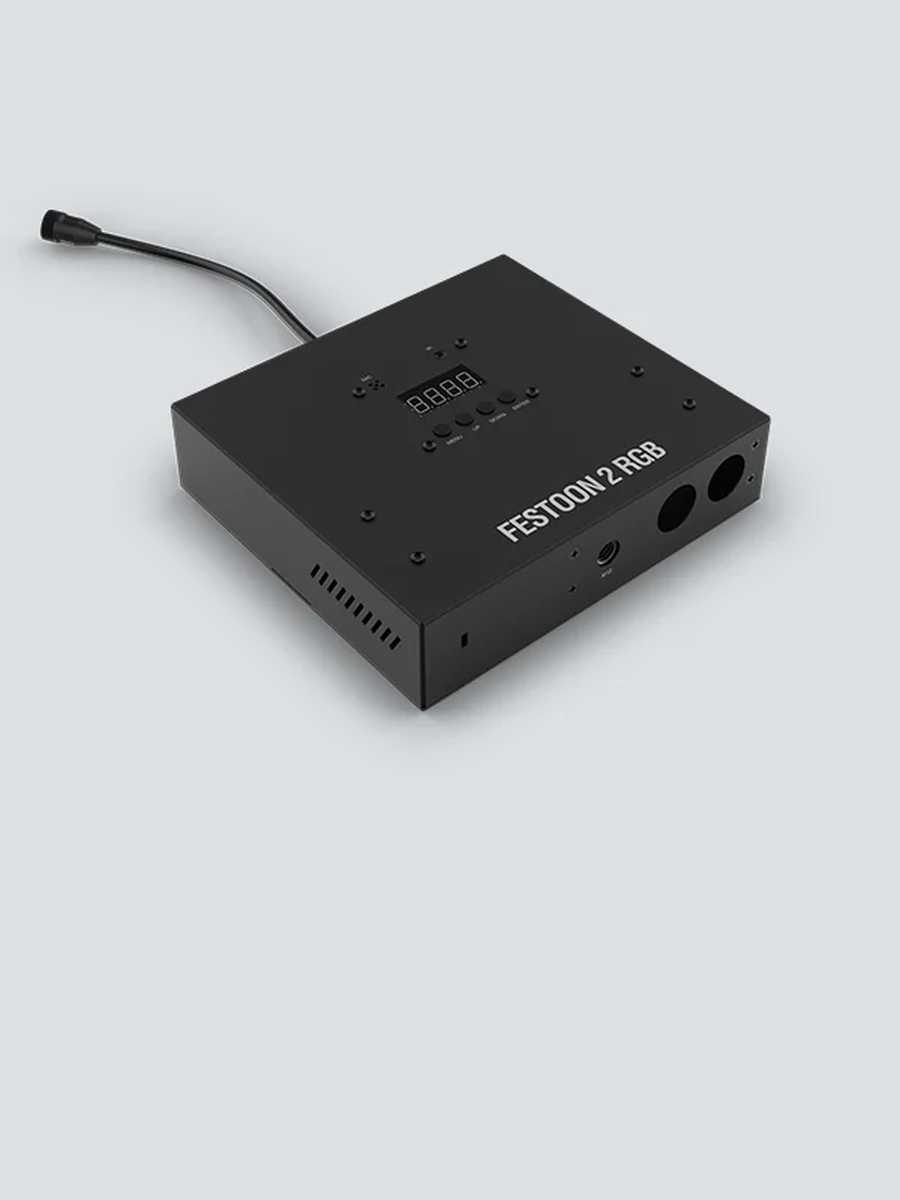
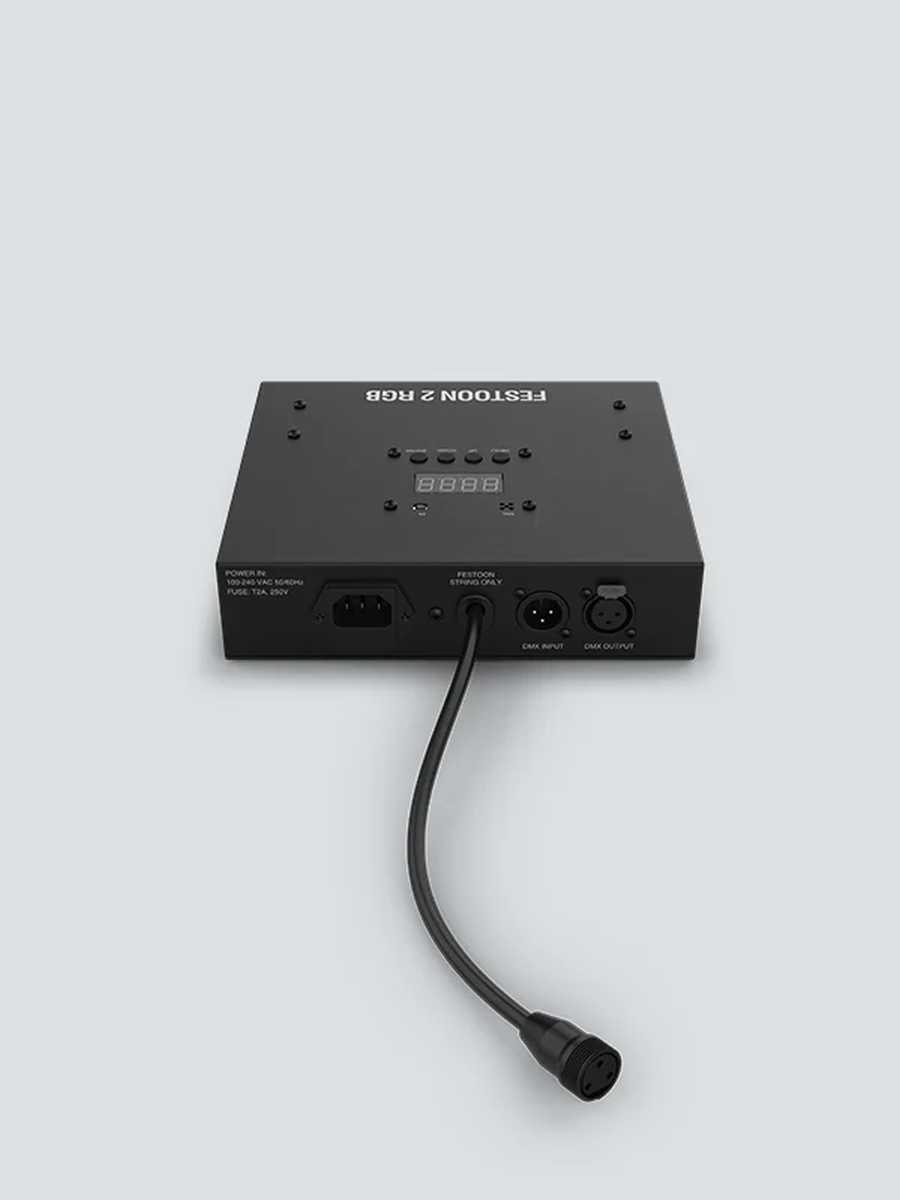
The strings of lights connect to the Festoon 2 RGB controller that is a simple compact unit that features DMX Control, In built automatic programs, sound to light programs, static colours presets as well as a manual mode where you can manually mix your own colour although this mixes the whole string, not an individual bulb.

The auto programs and sound active modes have adjustable parameters so you can get your desired look. There are 38 in-built automatic programs that are selectable, each can be set to your desired speed too! The sound active mode of course has adjustable sensitivity as you’d expect!
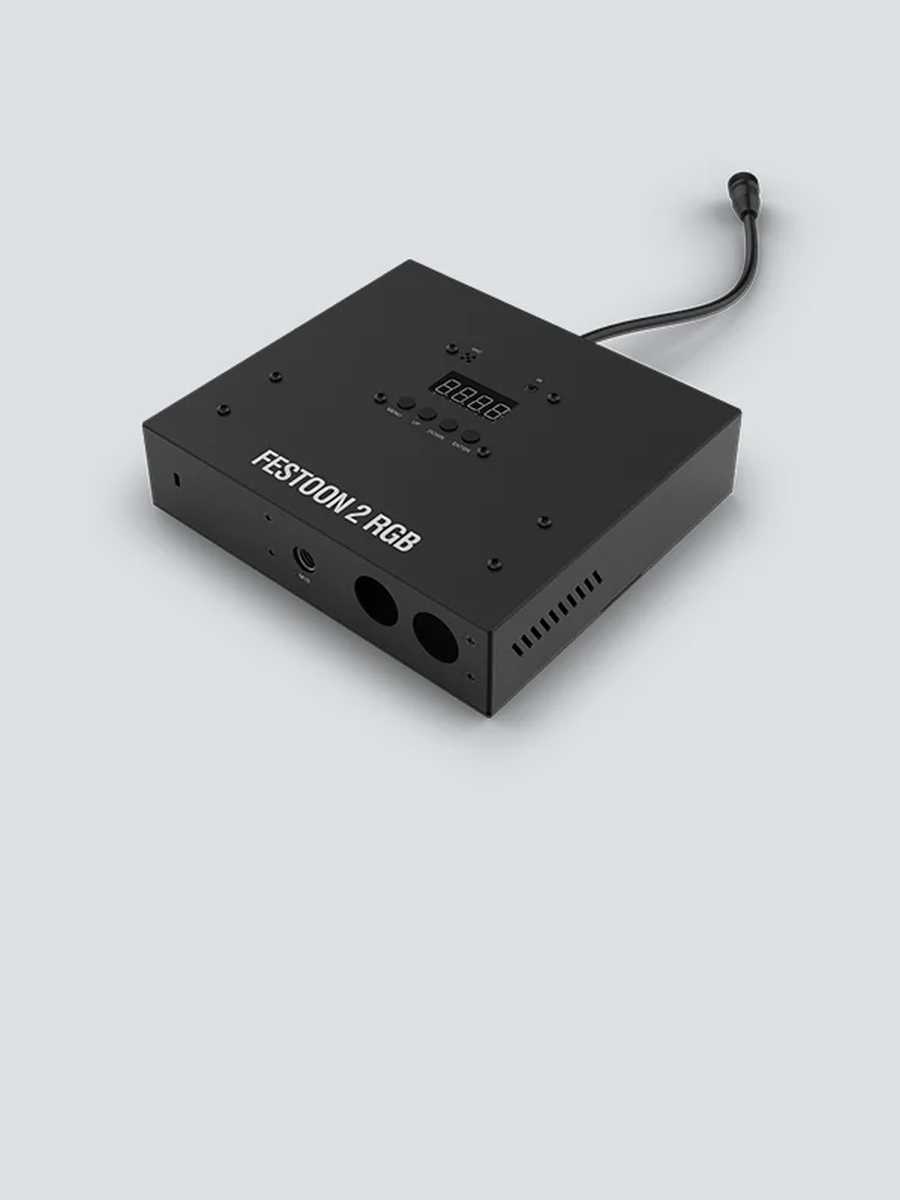
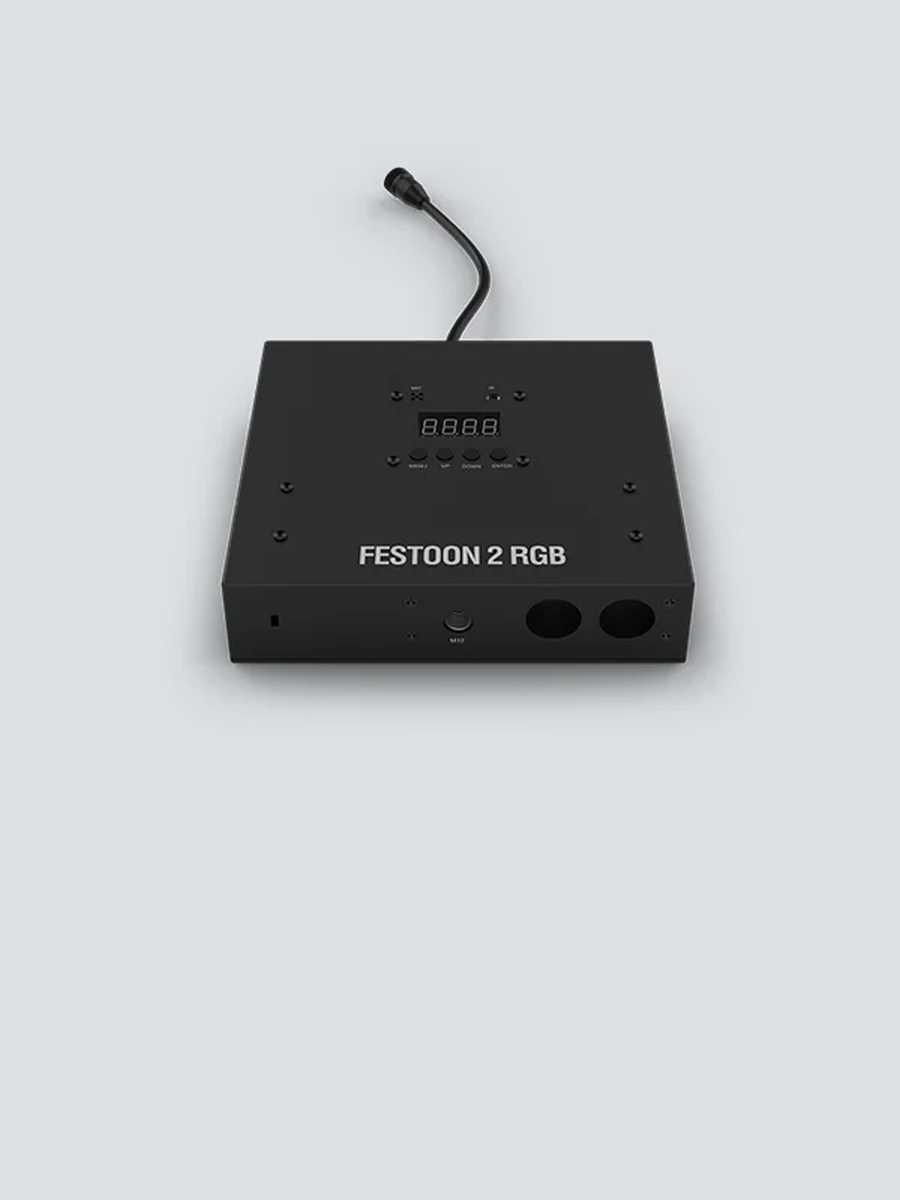
The control unit is fairly simple to use, it has a DMX input and output, the dedicated connector output for the strings of festoon and an IEC connector for power. On top you have the menu system with the standard arrangement of the menu, up, down and enter buttons accompanied by the small display.
It’s also worth mentioning that you can also control the Festoon 2 RGB with Chauvet’s IRC-6 remote control which they use for a range of other devices too.
The control unit also has multiple mounting points, to the rear there are keyholes incase you wanted to permanently mount the unit but there is also an M12 mounting point if you wished to mount hardware to the controller to hang it from a lighting bar or truss. There is also 2 circular cut outs in the body so you can look a safety cable around the unit, you can never be too careful!
In the box the festoon 2 RGB also comes with a 5m long cable to connect between the control unit and the first string of festoon. The controller itself isn’t waterproof so it makes sense why they’d provide this…. And of course you don’t want to have the controller unit right next to the first bulb, you’d want to attempt to hide it away really.
We didn’t really do much testing with the in-built settings as we were eager to DMX this baby up and see what we could do with DMX control, Lofty wanted to get his pixel map on!
We were really pleased that Chauvet also sent us the Festoon 2 RGB EXT which is essentially a second 15m long string of bulbs so we had 40 bulbs and 30m of controllable festoon to play with.. I mean test!

The Story
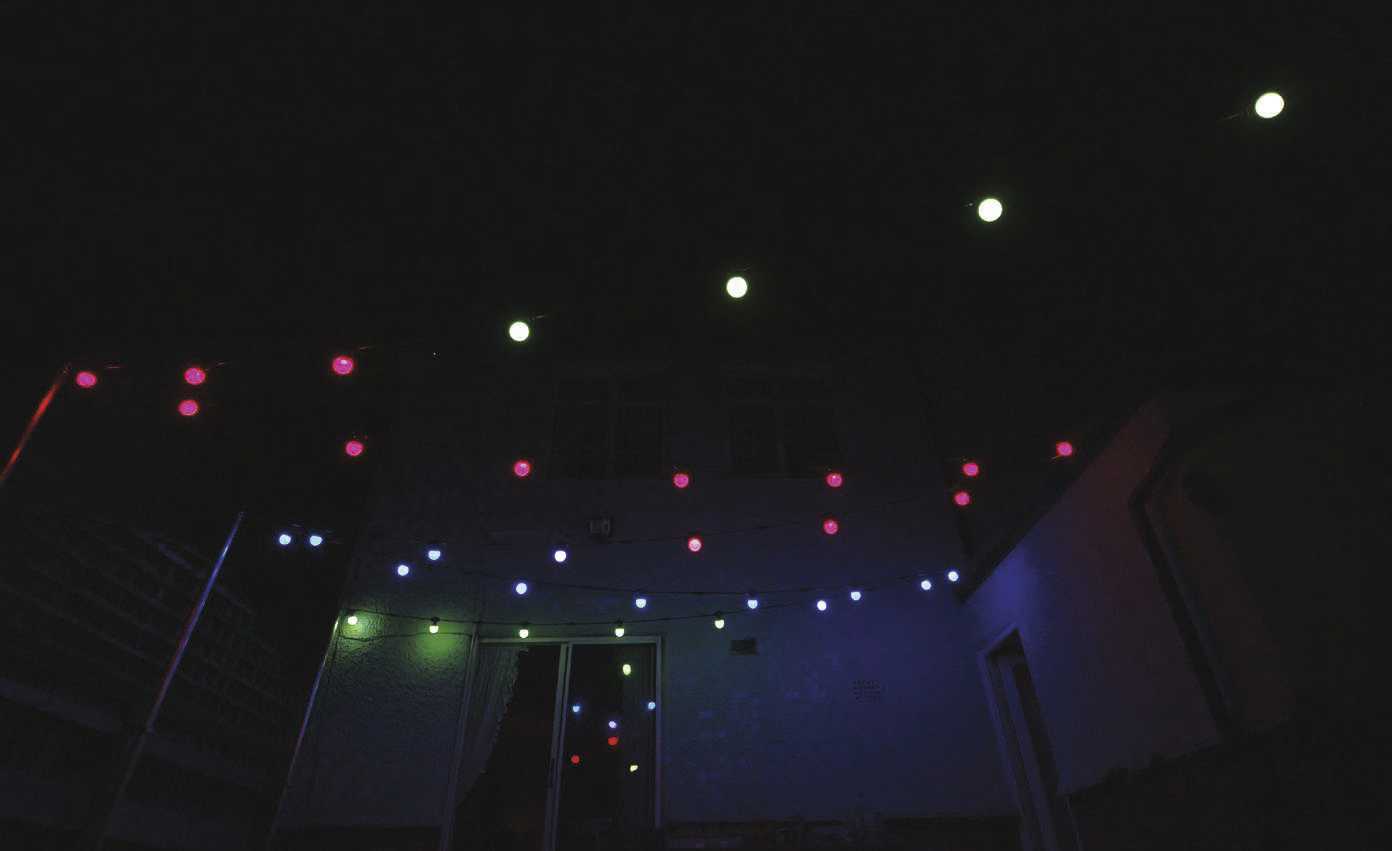
On a lovely Sunday afternoon, Neal, Lofty and I turned my back garden into a temporary lighting rig and we got on with setting up the festoon by attaching it to the fence and the house. The rigging was pretty each as each bulb has a little loop on the top so you can pass a cable tie through for mounting and hanging. In about 45 minutes we had it all up and ready to go, we just needed to wait for the sun to disappear before we could play!
The setup could have been a bit quicker but I wanted to make sure the bulbs were high enough in the air so they were out the way so we screwed clamps and single truss tubes to the fence to make them high enough, they ended up being around 2.5m from the decking below.
We managed to get 5 runs of strings back and forth horizontally between the house and the truss tubes on the fence, enough to give us a little matrix type grid to play with. Of course it was nearly impossible to space them out exactly and have them in an exact grid but we got them pretty close.
Once setup we knew we turned on the controller and made sure to set the controller to it’s 2 string mode so it knows it has 2 strings attached to it, allowing us to control all 40 bulbs individually. We then got onto addressing the control unit which was easy, we simply put the unit into one of it’s 4 DMX modes (we used pixel) and set the DMX address on the controller and we were ready to go!
The different DMX modes mean you can control the festoon in different ways, the 3 channel mode is simply RGB – basically you can control the red, green and blue of all the bulbs at once and mix them to get whatever colour you like.
The 9 channel mode is similar but it also adds other functions like a master dimmer, colour macros, a strobe and the ability to trigger the in-built automatic and sound active programs and their speed / sensitivity, there is also a dimmer speed control too.
There are 2 pixel modes on board, pixel and pixel+. Pixel is exactly what it says on the box, the ability to control each bulb as if it were a pixel, each bulb takes up 3 DMX channels that control the red, green and blue of each bulb, again these can be mixed to get most colours. That’s 3 DMX channels per bulb so we had 40 bulbs and 120 DMX channels to use on our test.
The pixel+ mode expands on the pixel mode and also adds in the abilities of the 9 channel mode where you can trigger the inbuilt programs and sound active modes, use the master dimmer etc.

So we were ready and the light was fading and the playing began! At first we questioned the brightness of the LEDs in the bulbs as they are only stated as 5x 0.1w LEDs, so only 0.5w per lamp and in the daylight you could make out the faint colour glow but the effect really came alive after the sun began to disappear beyond the horizon.
We wasn’t quite sure what to expect as 0.5w doesn’t sound like a lot but in truth, the amount of light they gave off was absolutely perfect.
For festoon you don’t want over powering light, you just want a nice glow, and this is exactly what the Festoon 2 RGB does and it does it very well. Initially we started testing with a white colours as traditionally festoon isn’t often coloured, it’s usually white!
As you’d expect with red green and blue on full the white was slightly tinted and quite a cool white. We played around with the mix a bit and found that we could get a very nice warm white colour that would be perfect if you wanted to use these in a traditional way. Of course the joy of these being DMXable means that they could be setup in a warm white and then instantly changed to do different effects and patterns which could be quite an attractive selling point!
Traditional festoon is often done with halogen lamps which can often be hot and potentially unsafe if they were in reach of a guest. You’d also need to leave time for them to cool down before de-rigging to avoid any burns. Of course recent developments in technology has meant people can use LEDs but they still often use glass lamps which could also pose a risk.
The Chauvet Festoon 2 RGB eliminates these problems as the LEDs do not run not and use a plastic rugged housing so they can be put up, run and taken down without any delay or worry of breaking them.
Let’s also mention that being thanks to LED the power draw is very little, just under 110w with 3 strings attached to the control unit, and another advantage of LED… they are rated at 50,000 hours use too so you shouldn’t need to change them but if you do, you can simply change a little section in the string!
Now onto what we thought… well let’s just say we started really testing when the sun went down and it was the next day before we packed it up and went to bed, oops!
We loved the pixel mapping capabilities, we were able to map lovely rainbows, waves and twisting patterns into the grid of lamps. We also tried a random strobe over the top of a really dim white and the effect looked amazing!
Conclusion
In conclusion we like the Chauvet Festoon 2 RGB very much, it’ll certainly have it’s place in the Wedding and events industry, it has so many uses and potential effects – use it as garden or path lighting, as a pixel grid on a backdrop, as standard glowing festoon or as a pixel mapped effect, imagine lining the entrance to a venue or room and using them like a runway type effect where the lights run down towards the entrance, now that would look awesome!
The only change we’d like to see would be the connector from the control unit, I would prefer a port rather than the cable that comes out of the unit. We wasn’t too keen on the connectors between the strings but they’re a welcome feature as each section is replaceable if there ever were an issue and of course they are weather proof so they are essential, we didn’t try it but we assume you would also be able to put an extension cable between 2 strings if you needed to too?
Well done to Chauvet for creating a great product, I’m sure we’ll start to see them popping up at Weddings and events very soon!
Jack Wilson
Director at Kent Media Group
Photo Gallery